Set-Up Instructions: Outlook Express 5.x &
6.x
Have your email address handy for the following set-up instructions. Your
email address is typically your username@mydomain.com where mydomain.com is
your own domain name.
- Launch Outlook
Express from the START> PROGRAMS menu or double-click the
Outlook Express icon
 on your desktop.
- Once in Outlook
Express, Click Tools and choose Accounts.
- The Internet
Accounts box should appear on your screen. Click the Mail
tab.
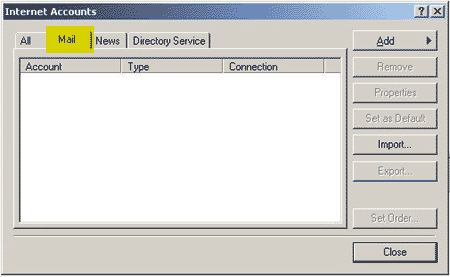
- Click Add,
and choose Mail.
- Where it asks
for Display Name, enter your name as you would like it to appear
on email you send to others. This can be completely different from your actual
email address.
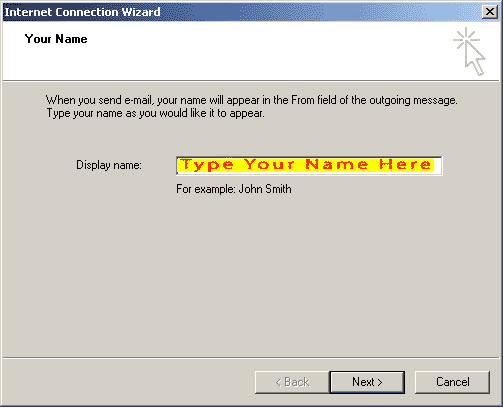
- Click Next.
- Click the button
for "I already have an email address I would like to use." Enter your
email address, in the format 'username@mydomain.com'
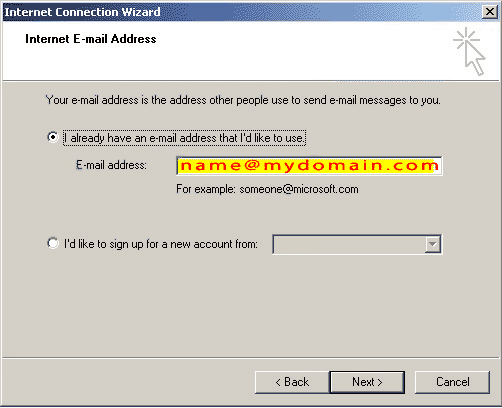
- Click Next.
- This screen
asks for the names of the incoming and outgoing mail servers. Please enter
the following info:
- My incoming
mail server is a POP3 server.
- Incoming mail:
mydomain.com
- Outgoing mail:
mydomain.com
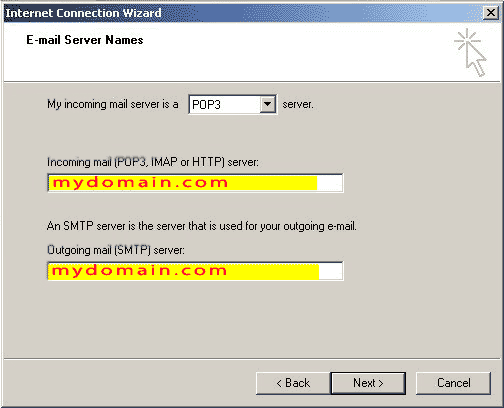
9a. An alternative for Outgoing mail server is to
use your interconnectivity ISP provider's setting.
- Click Next
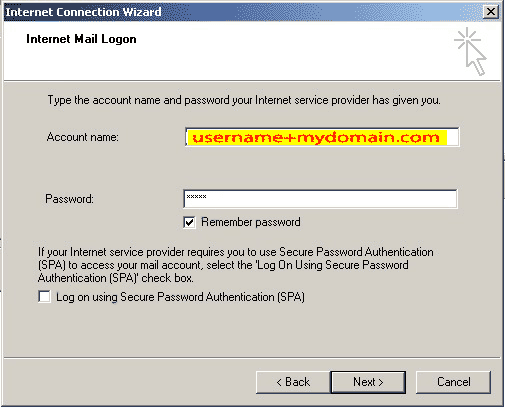
- Fill in your
account name. This is the same as your username with SherwoodHosting.com.
If you would like, you can enter your password. We believe this to be
safe as long as you're the only one with access to your account on your own
computer.
Special
note: We advise using the special syntax for your account
name as shown below
using
a plus sign (+)
for the user name. |

- Click Next.
- Click Finish
to save the settings.
- Click Close
to close the Internet Accounts box. You are now setup to send and receive
email